
When you want certain text in your document to stand out, you can use a handy built-in tool. Here’s how to highlight text in Word.
Ever used a highlighter pen to make certain sections of text pop out to you on a page? Great for making notes, but there’s a problem—highlighting a piece of paper is final. You can’t erase the color from your paper when you’re done.
In Microsoft Word, things are a bit different. Unlike real highlighter pens, you can replicate the highlighter effect in Word, but you can find and remove your highlights.
This lets you go through and review your highlighted points using Word’s Find feature, but you can also remove any text highlights afterward. It’s easy to learn how to apply, remove, and find highlighted text in Word—here’s what you’ll need to do.
If you plan only to highlight one portion of text using a single color, you can do this in just seconds in Word.
To highlight a section of text in Word:
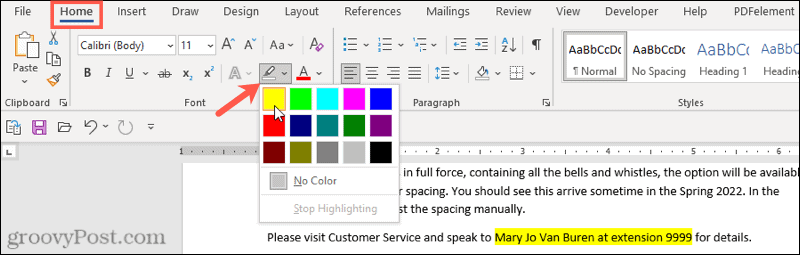
Once you choose a color from the drop-down menu, your selected text will update immediately to show a highlighted background in that color.
If you have several portions of text you want to highlight, you can still use the highlighter tool to make your text stand out.
You don’t have to use the method above to do this, however, as there’s an easier way to select multiple text sections. Once you enable the highlighter, it will remain turned on until you turn it off, allowing you to highlight additional areas.
To highlight multiple sections of text in Word:

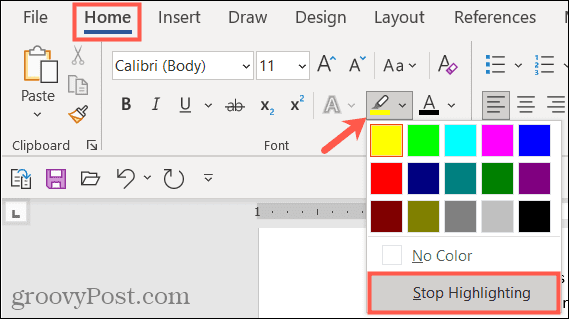
You can do this when the highlighter tool is active if you want to change colors. Click the Text Highlight Color button, choose another color, and then continue to drag through your text portions to highlight them.
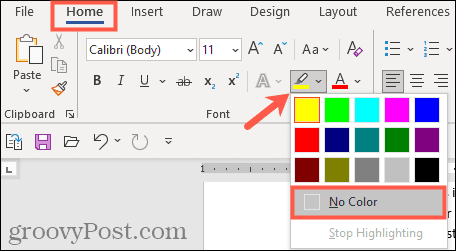
You can do this using the Text Highlight Color tool when you want to remove highlights from your text in Word. This allows you to remove highlights from specific text or your entire document.
To remove highlights from selected text in Word:
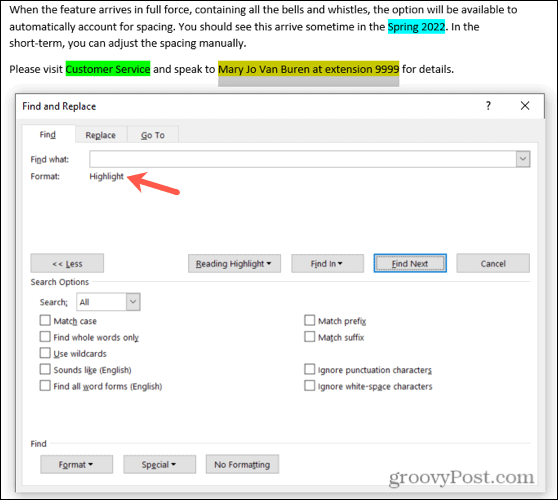
You don’t need to manually scroll through your document to find portions of text that you’ve highlighted. Thanks to the Find feature in Word, you can locate any highlighted text quickly.
Maybe the highlighted text you’re looking for contains a particular word. If so, use these steps to find it:
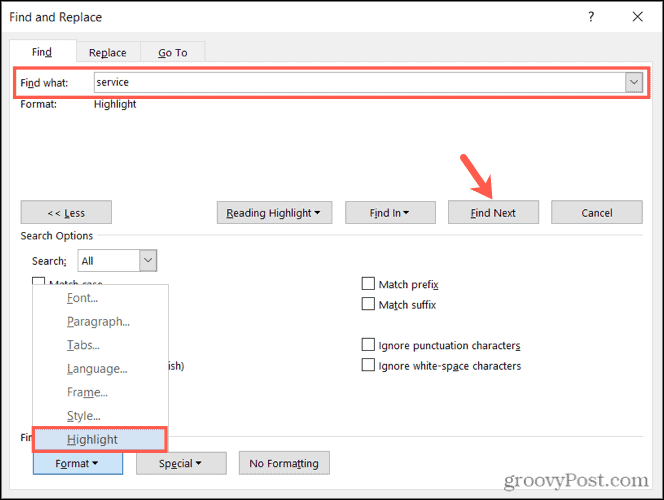
When you run the search, you’ll see any highlighted text that matches your search term. At this point, click Find Next to cycle through your search results, or press Cancel to close the window.

To find all of the text you’ve highlighted in your Word document, repeat the steps above, but eliminate Step 2. You don’t need to use an Advanced Find here, and make sure to leave the Find What box empty.
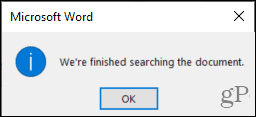
When you click Find Next, you’ll see the first portion of highlighted text found. Continue to click Find Next to cycle through and see each additional section of the highlighted text in your document.
When no further instances are found, you’ll see a message letting you know.
Fifteen nifty colors, a handy method for finding your highlighted text, and an easy way to remove it afterward—you can pack away your physical highlighter pen and use Word’s highlighter tool to start making notes instead.
Are you interested in upcoming tutorials for Microsoft Word? Connect with us on Twitter or Facebook to stay in the loop!